Schedule your first post
Open a post, pick a date and time in the box under it, and press the button, which now reads Schedule for that time. Leave the box empty and the same button posts straight away. Everything you schedule shows on the Schedule page, where you can move it, send it now or cancel it.
Where this stands today. Scheduling needs a connected Instagram account, and direct posting is opening account by account while Meta reviews the connection. If yours is not connected yet, use Save slides or Send to my phone under the post and publish from your phone.
Before you start
- A paid plan. On the free account you can read your posts, but not save or post them.
- An Instagram account connected in Accounts. The time box only appears once one is connected.
- For a reel: the Growth plan, and a finished video you have watched and approved.
Step by step
Open Posts and pick the day
Posts is under Create in the menu. Your week is split into Day 1 to Day 7. Choose Feed 4:5 for the Instagram feed. Read the slides and the caption, and change anything first, because a scheduled post goes out as it is.
Pick a date and time
Under the caption there is a date and time box. Choose when the post should go out. The button next to it changes from Post now to Schedule for that day and time. Times are in your own local time.
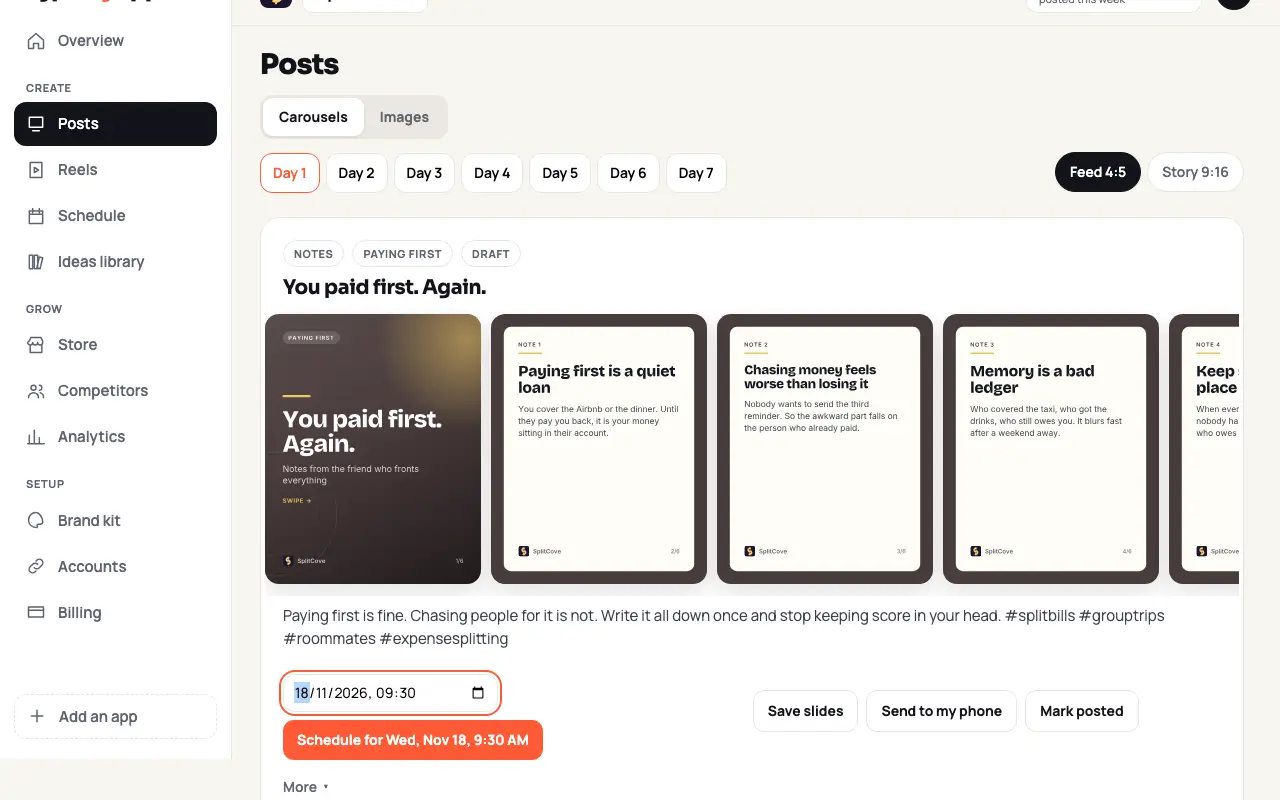
A time is picked, so the button now says Schedule for that time. Press Schedule, or Post now
Press the button. The post shows a Scheduled label with its time and a Change link. If you left the box empty, the post is sent to Instagram straight away instead.
Check the Schedule page
Schedule is under Create. It shows the next 14 days as a calendar, a Coming up list, and what has already gone out with a link to open it on Instagram.
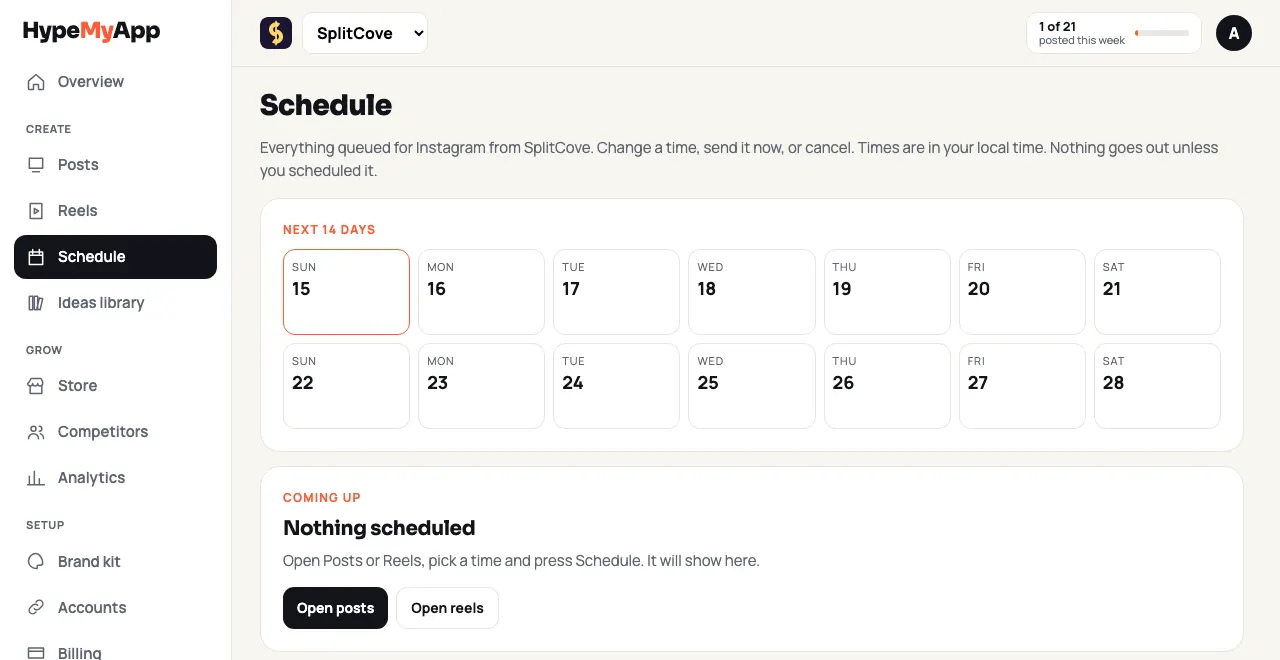
The Schedule page: two weeks at a glance. Move it, send it now or cancel it
Tap any scheduled item to see it full size. Set a new time and press Save time, send it now, or cancel it. A cancelled post stays in Posts so you can schedule it again.
Scheduling a reel
Open the reel in Reels. Once the full video is rendered and you have approved it, the same time box appears with the question When should it go out on Instagram? Pick a time or post now. A second button sends it as a trial reel.
A scheduled item goes out within about five minutes of its time. Nothing is ever posted that you did not schedule or send yourself. Single images from the Images view download to your device and are not scheduled from the workspace yet.
If it does not work
Related docs
- Connect your Instagram account
- What is a trial reel on Instagram?
- How do I post a HypeMyBrand carousel to Instagram or TikTok?
- Is it safe to connect my Instagram to HypeMyBrand?
- Does HypeMyBrand post to TikTok for me?
Still stuck? Email team@apsteq.com with what you tried and what you saw. A person answers, and the fix goes on this page.